To share files and folders on a Windows 11 PC with other computers or devices on the same network, you need to turn on the "Network Discovery and File Sharing" option in Windows 11 first. This post from MiniTool tells you how to turn on network discovery and file sharing in Windows 11.
What Is Network Discovery and File Sharing
What is network discovery and file sharing? Turning on the "Network Discovery" setting will allow the computer to view other computers and devices on the same network. It also allows other computers on the same network to see the computer.
Turning on the "File and Printer Sharing" setting will allow other computers or devices to access the files, folders or printers you shared from this particular computer.

Then, let’s see how to turn on network discovery and file sharing in Windows 11.
How to Turn on Network Discovery on Windows 11
Here, we will introduce turn on network discovery in Windows 11.
Step 1: Press the Windows + I keys at the same time to open the Settings application.
Step 2: Then, click the Network & Internet part and click Ethernet. Then, click the Change advanced sharing options option.
Step 3: Under the Network profile type part, you can choose public or private.
- If you choose private, this profile will allow the discovery of devices in your network. If you need to share files or use applications that communicate over this network, you should also select this profile.
- If you have other networks, such as Wi-Fi (if you are connected to a wireless network) or Ethernet (if you use a network cable to connect to the network), you can also set the profile type to public.

How to Turn on File Sharing on Windows 11
This part is about how to turn on file sharing on Windows 11.
Via Settings
Step 1: Go to Settings > Network & Internet. If you are using a Wi-Fi network connection, you need to click Wi-Fi from the left menu. While, if you are using a network cable, you need to select Ethernet.
Step 2: Select the Change advanced sharing options link under Related settings.
Step 3: Turn on file sharing.
- Under Private (current profile), check Turn on network discovery and also check Turn on automatic setup of network connected devices.
- Expand Private (current profile). Check Turn on file and printer sharingunder File and printer sharing.
- Scroll down and expand All Networks. Check Turn on sharing so that everyone with network access can read and write files in the Public foldersunder Public folder sharing.
Step 4: Click the Save changes button.
Via Control Panel
Step 1: Type control panel in the Search box to open it.
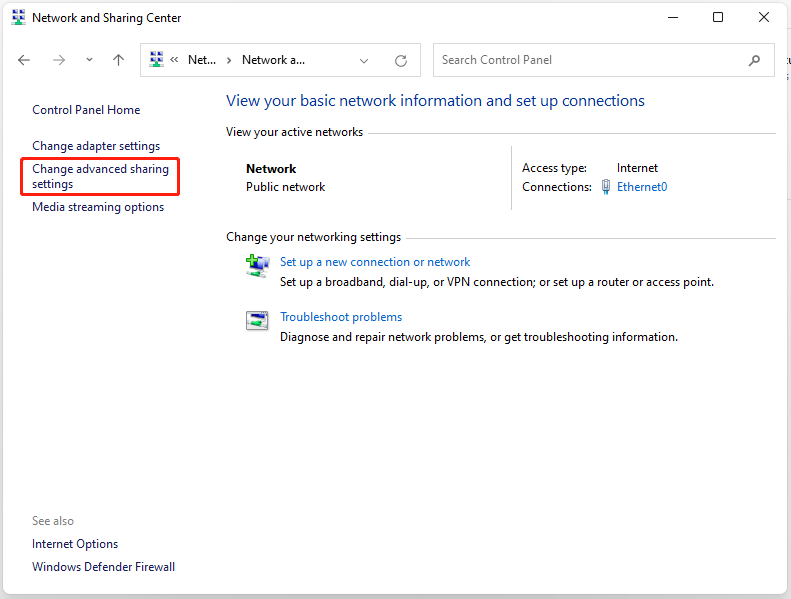
Step 2: Then, select Network and Internet and select Network and Sharing Center.
Step 3: Next, select Change advanced sharing settings.
Step 4: Turn on file sharing.
- Under Private (current profile), check Turn on network discovery and also check Turn on automatic setup of network connected devices.
- Expand Private (current profile). Check Turn on file and printer sharingunder File and printer sharing.
- Scroll down and expand All Networks. Check Turn on sharing so that everyone with network access can read and write files in the Public foldersunder Public folder sharing.
Step 5: Save your changes.
Final Words
Here is all information about how to turn on network discovery and file sharing in Windows 11. I hope this post can be helpful to you.
About The Author

Position: Columnist
She was graduated from the major in English. She has been the MiniTool editor since she was graduated from university. She specializes in writing articles about backing up data & systems, cloning disks, and syncing files, etc. She is also good at writing articles about computer knowledge and computer issues. In daily life, she likes running and going to the amusement park with friends to play some exciting items.
User Comments :
Post Comment