MiniTool ShadowMaker User Manual
Backup Features
MiniTool ShadowMaker offers straightforward solutions to deal with all kinds of backup tasks, including file backup, system backup and disk backup. These backups contain exactly the same copy of all the data stored on the original disk or partition. Such backups allow you to recover your computer to the normal state when Windows works incorrectly or partition data get lost.
How to Back up Files
File backup will back up each file you select on the PC. MiniTool ShadowMaker offers quick file backup solution and also allows you to back up the files and folders when they are in use. It enables you to quickly choose files/folders from Users, Libraries and This PC and then save the image files to a safe location.
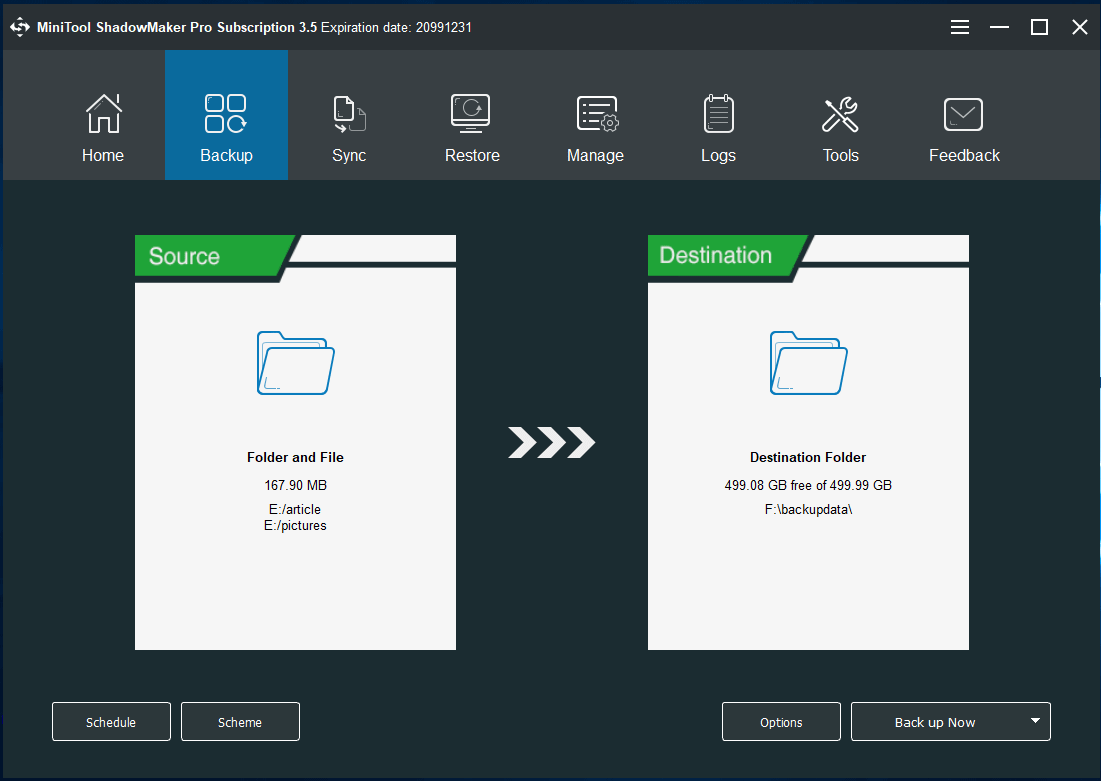
Step 1. Run MiniTool ShadowMaker to its main interface.
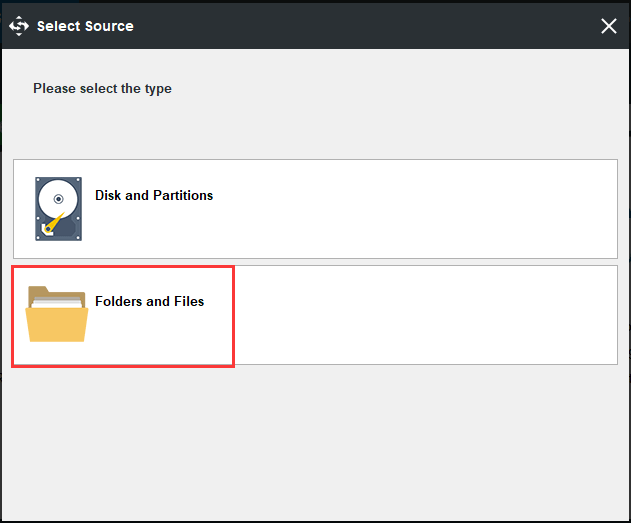
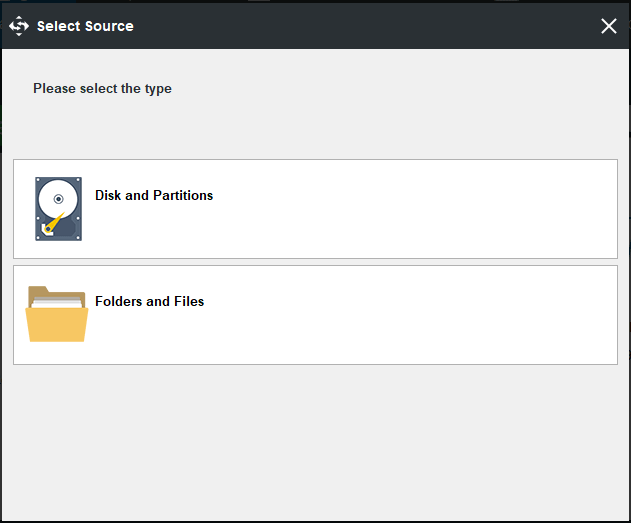
Step 2. Under Backup, click the Source tab. Then in the pop-up window, choose Folder and Files.
Step 3. Browse the source and check the desired files/folders you want to back up and click OK.

Step 4. Now in the main interface of MiniTool ShadowMaker, click Destination.
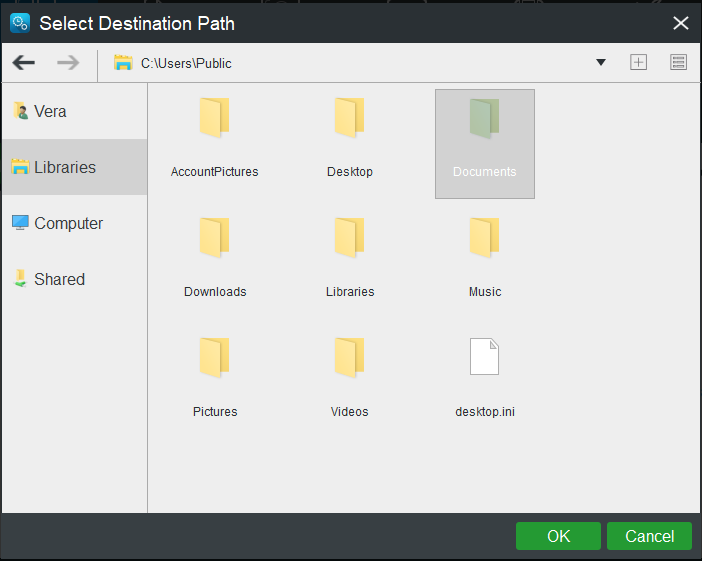
Step 5. Select the destination path. MiniTool ShadowMaker allows you to back up your computer to multiple places:
1. Administrator account folder
Click Administrator (sometimes your account name), and then choose one folder as the destination location.
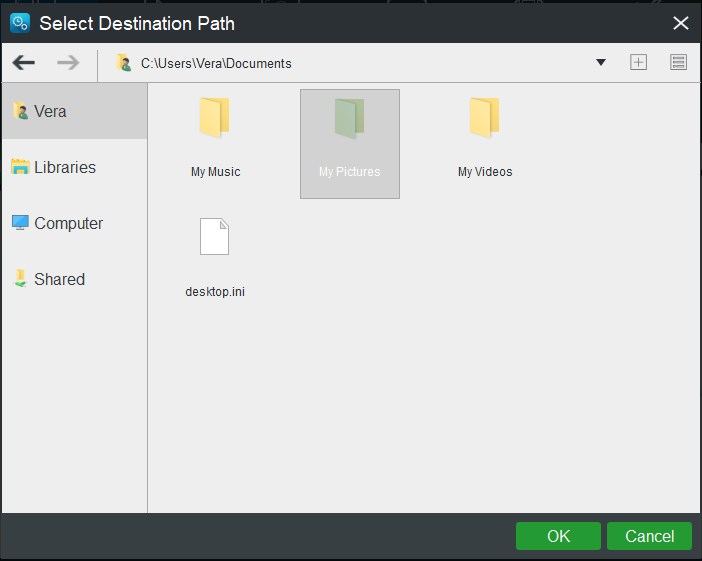
2. Libraries
Click Libraries and choose one folder to store the backup image file.
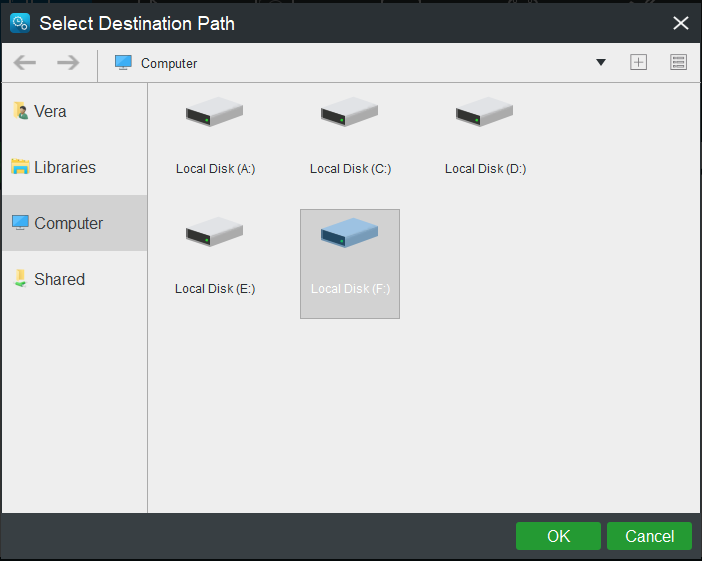
3. Computer
Under this tab, all drives that Windows can detect will be listed. And you can choose a partition on your internal hard drive, external hard drive, or removable USB flash drive as the target place to store the backup image file.
4. Shared
Besides, you are allowed to back up your PC to NAS. Just go to the Shared tab, click Add new button, and type the path, user name and password.

Step 6. Finally choose to Back up Now or to Back up Later. You can start the delayed backup task in Manage page.

Tips
- To set advanced parameters for the current backup task, click Options.
- To specify a backup task to run on a regular basis, go to Schedule.
- To manage disk space occupied by backup files, go to Backup Scheme.
How to Back up System
MiniTool ShadowMaker provides a one-click system backup solution. It enables you to back up your system drive completely, including system partition, system reserved partition and EFI system partition. All data including applications, drivers, computer settings, system files and boot files will be imaged.
Note
Some of you may ask: Do I need a backup that is bootable? Which files get backed up? System files? Hidden files?
Sure, you need a backup that is bootable. And all files for Windows to run such as system files, hidden files, etc. will be backed up. When the system crashes, you can restore your computer to a normal state.
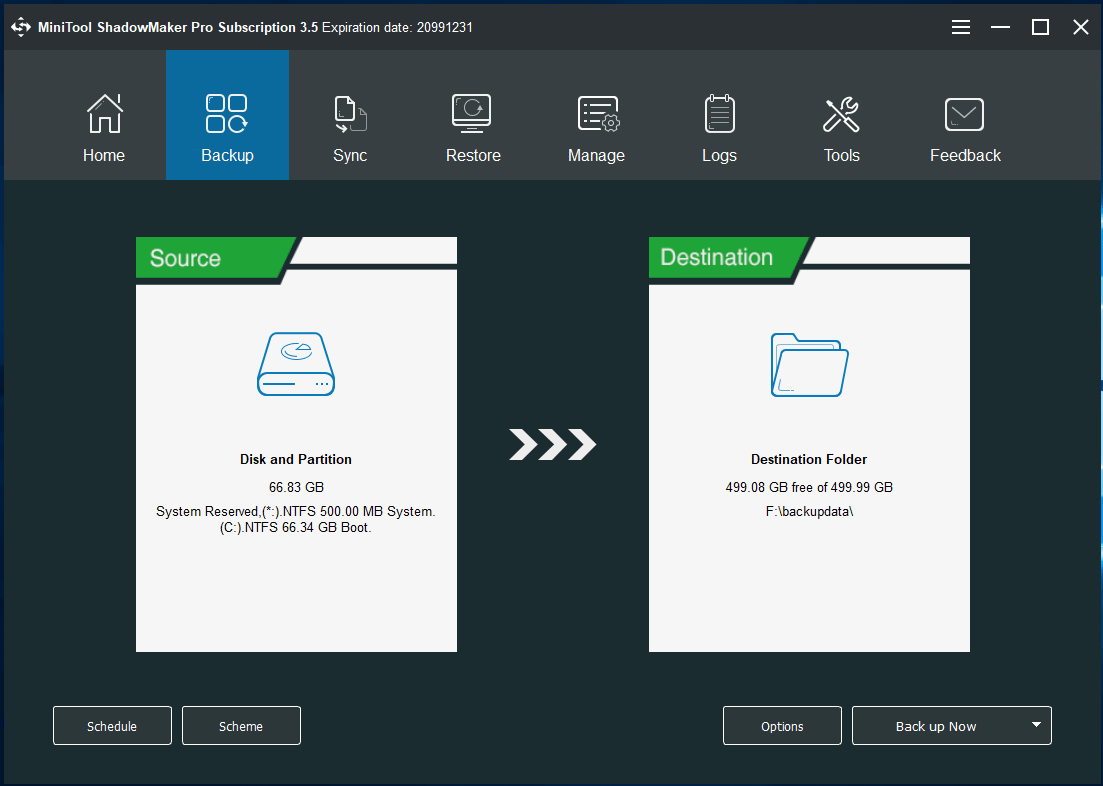
Step 1. Launch MiniTool ShadowMaker to get the main interface.
Step 2. MiniTool ShadowMaker is designed to back up Windows OS by default. In the Backup bar, you can see system required partitions are checked by default. Thus you only need to click Destination to choose a destination path to store the system image.

Step 3. Then in the pop-up window, you will see all the partitions on your computer are displayed here. It is recommended to choose one partition of an external hard drive as the location.

Note
In addition, you can also back up your PC to NAS, the Libraries folders, etc. To learn more information about the destination location, you can go to How to Back up Files.
Step 4. Click Back up Now to start the process immediately or choose Back up Later to delay the backup. You can start the delayed backup task in Manage page.

Tips
- To set advanced parameters for the current backup task, click Options.
- To specify a backup task to run on a regular basis, go to Schedule.
- To manage disk space occupied by backup files, go to Backup Scheme.
How to Back up Disk
Disk backup will back up all your files on the disk into a compressed image file, including all partitions on the disk, as well as the system files. If you back up a system disk, your computer can boot directly after restoration. MiniTool ShadowMaker supports backing up MBR disks, GPT disks, external hard drives, USB drives, and other storage devices that can be recognized by Windows.
Step 1. Launch MiniTool ShadowMaker to enter the main interface.
Step 2. Under Backup, click the Source tab.
Then click Disk and Partitions from the pop-up window.
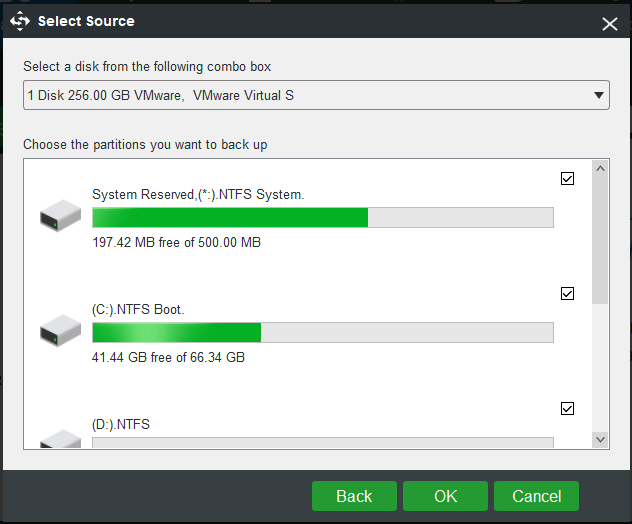
Step 3. Drop down the disk list box to choose a hard drive, check all its partitions and then click OK.
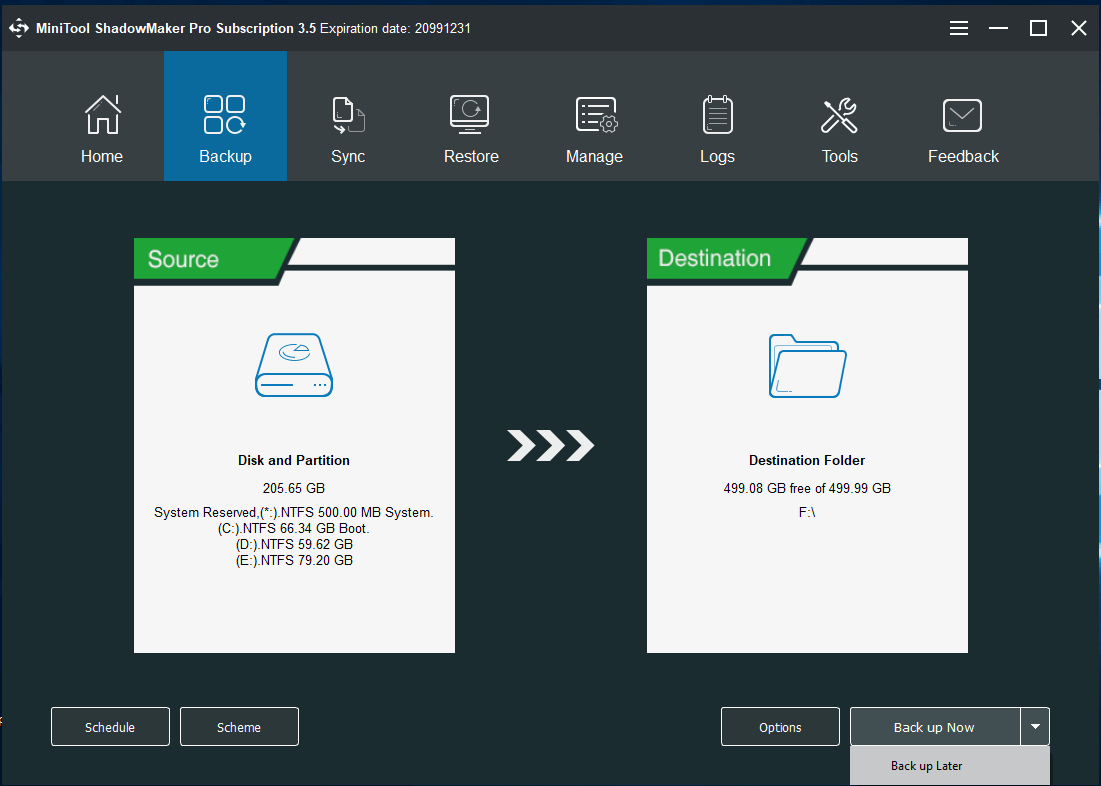
Step 4. Then at the Backup page, click Destination to choose a location to store the disk image. You can back up your disk to any of the location listed in the left panel. Here it is recommended to choose the partition of an external hard drive as the disk image storage location.

Note
In addition, you can also back up your PC to NAS, the Libraries folders, etc. To learn more information about the destination location, you can go to How to Back up Files.
Step 5. Click Back up Now to start the process or click Back up Later to delay the backup. And you can restart the delayed backup task in Manage window.
Tips
- To customize the current backup task, please see Backup Options & Schedule Setting.
- MiniTool ShadowMaker can only back up one hard drive disk each time.
- Dynamic disk (only simple volumes included) can be backed up.
- To manage disk space, go to Backup Scheme.
How to Back up Partition
Partition backup will back up all your files on the selected partitions into a compressed image file. If you have important files saved on a specific partition, it is recommended to do partition backup as data loss can happen unexpectedly. Besides, MiniTool ShadowMaker is able to back up the NTFS partitions with 2 MB cluster size.
Step 1. Run MiniTool ShadowMaker to enter the main interface.
Step 2. Under Backup, click the Source tab.

Then click Disk and Partitions from the pop-up window.

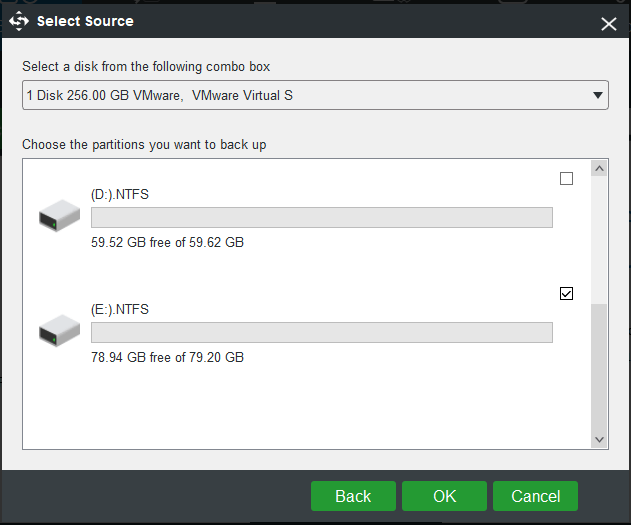
Step 3. Drop down the disk list box to choose the disk that contains partitions you want to back up. Then check the partition(s) in which you have saved important files as the backup source. Please note that each time MiniTool ShadowMaker only allows backing up partitions located on the same disk. After doing these, click OK.
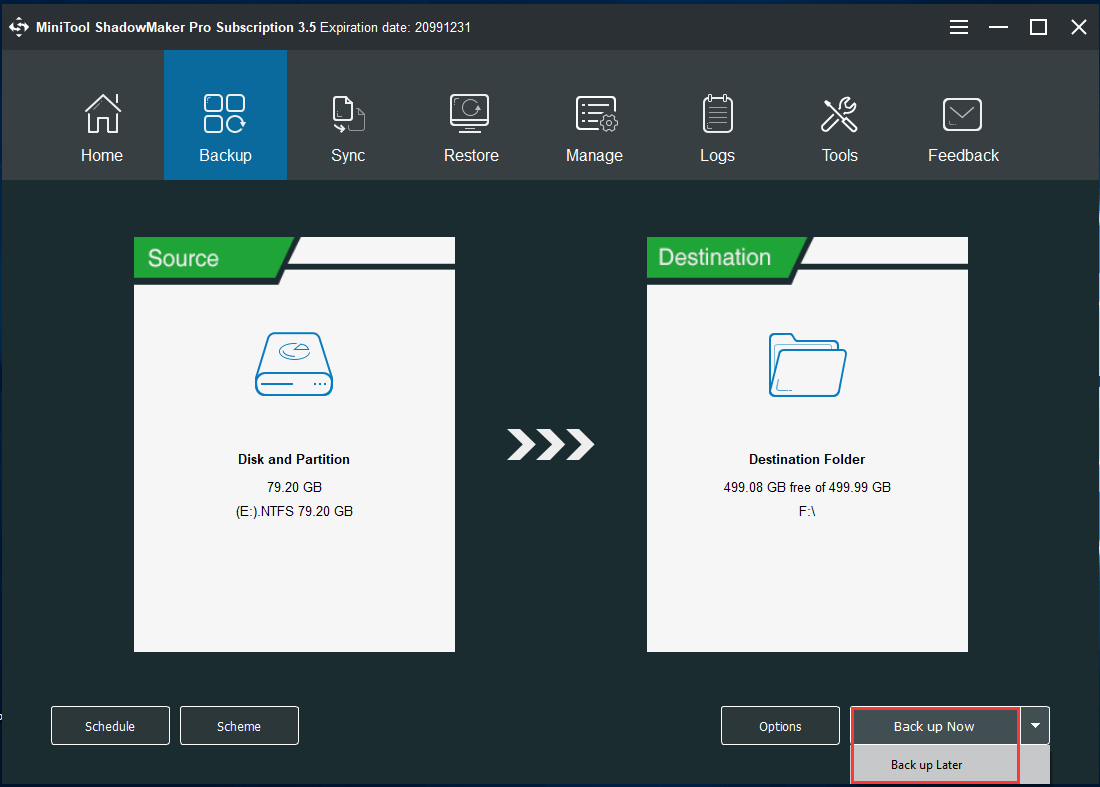
Step 4. Then at the Backup page, click Destination to choose a location to save the partition image. Here it is recommended to choose an external hard drive partition as the backup image storage location.

Note
In addition, you can also back up your PC to NAS, the Libraries folders, etc. To learn more information about the destination location, you can go to How to Back up Files.
Step 5. Click Back up Now to start the process or click Back up Later to delay the backup. And you can restart the delayed backup task in Manage window.
Note
- To customize the current backup task, please see Backup Options & Schedule Setting.
- Dynamic simple volume can be backed up.
- To manage disk space, please go to Backup Scheme.
Backup Options
During the process of backup, you can set some advanced parameters for every new backup task by clicking Options button at the lower right corner. Look at the following information:
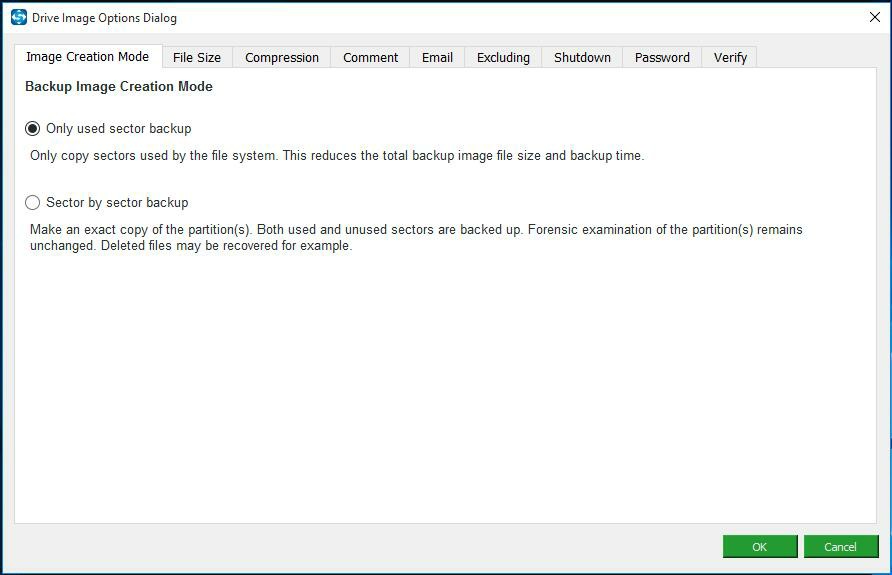
Image Creation Mode
During the backup process, you can set image creation mode. Two modes are displayed:
Only used sector backup: Only copy the sectors used by the file system. This mode can reduce the total backup image file size as well as the backup time.
Sector by sector backup: Make an exact copy of the partition(s). Both used and unused sectors are backed up. This mode won’t change forensic examination of the partitions, and even the deleted files may be recovered.
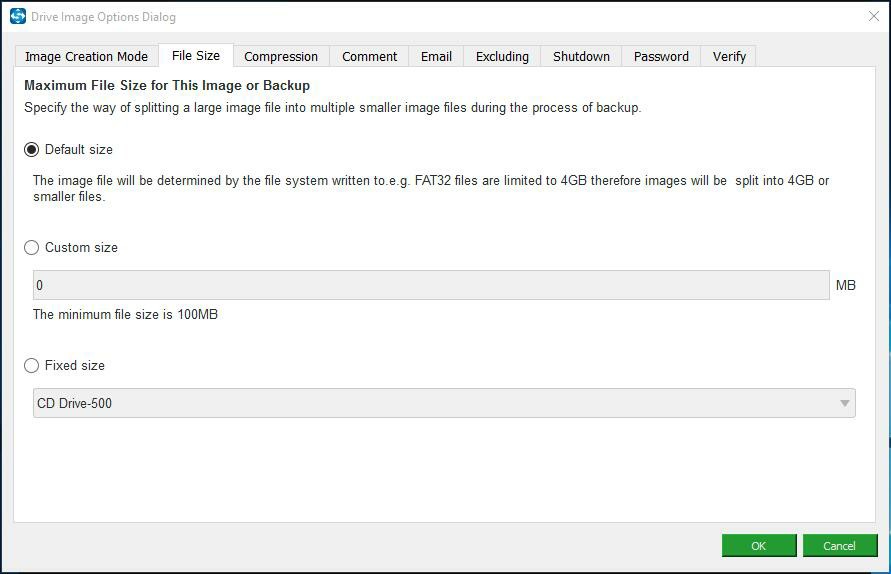
File Size
This option enables to specify the way of splitting a large image file into multiple smaller files during the process of backup.
Default size: The image file will be determined by the file system written to. For example, FAT32 files are limited to 4GB. Therefore, images will be split into 4GB or smaller files.
Custom size: You can choose to specify the image file size to meet various needs. Note: The minimum file size available is 100MB.
Fixed size: If you want to burn the image file to a CD/DVD, please choose a fixed file size, for example, CD Drive-500 or DVD Drive-6500.
Compression
This option enables you to compress the file size to save storage space. Please note that compression reduces the file size, but may increase the total backup time. See the following details:
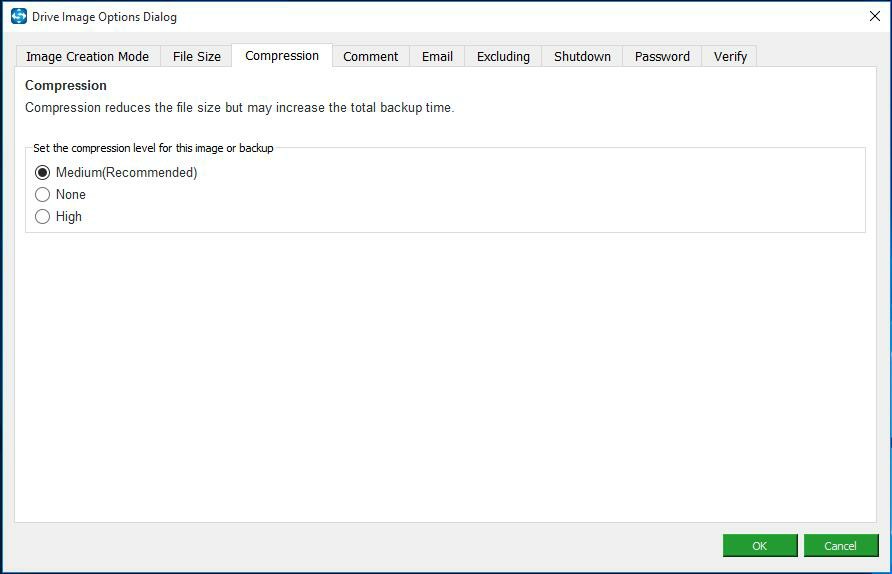
Medium: Data will be compressed moderately. This is the default data compression level.
None: Data will be imaged without any compression, which may increase backup file size.
High: This compression level will take a long time to create a backup and the image file size is smaller than the other two levels.
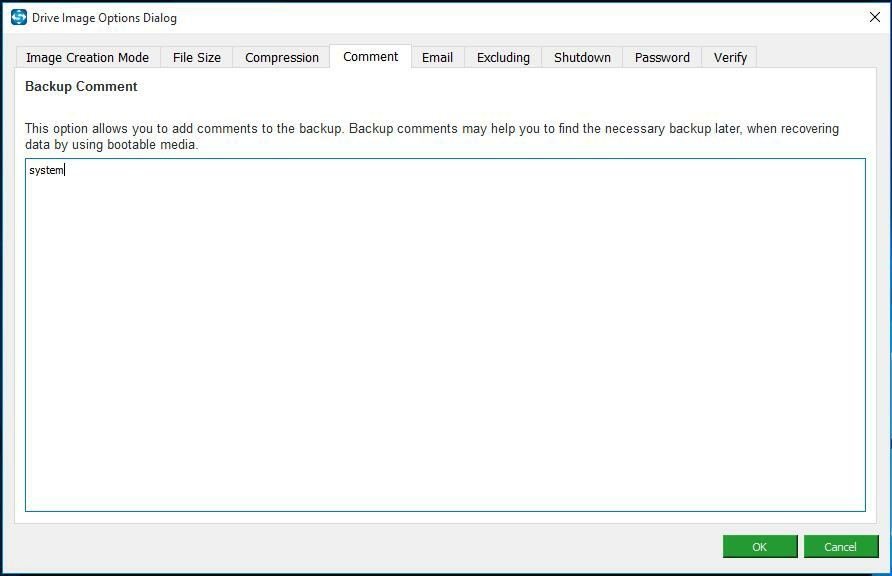
Comment
This option allows you to add comments to the backup, which is especially helpful to distinguish it from other backups when you are recovering data using the bootable media.
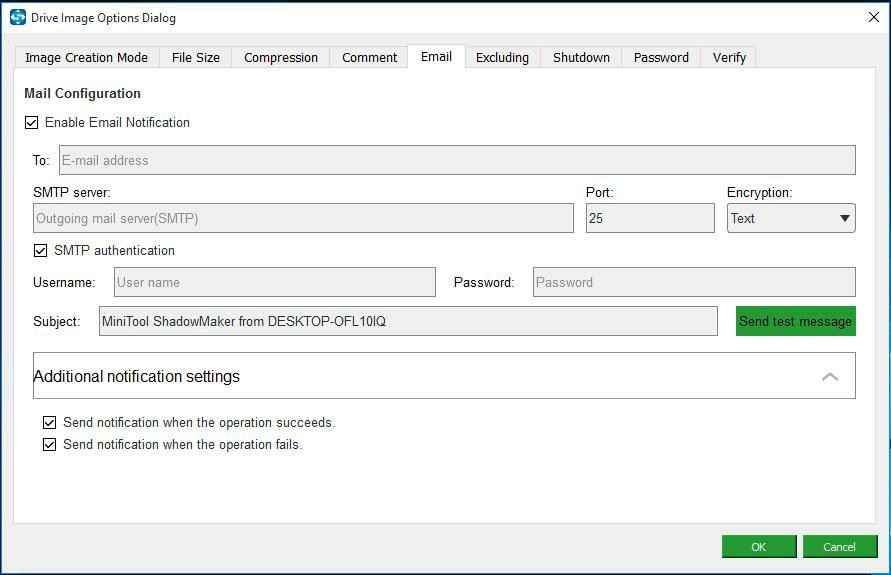
By enabling email notification, MiniTool ShadowMaker will send an email to inform you whether the backup task is successful or failed when the backup operation is finished. You need to customize the followings:
Email Address: Designate an email to receive the email notification.
SMTP server: Specify the receive email server depending on the specified email address.
Port: You do not have to choose the port and it will be automatically changed to the corresponding port after choosing the encryption mode.
Encryption: Three encryption methods are supported, including Text, SSL, and TLS.
SMTP authentication: Enter the email address and password for the email.
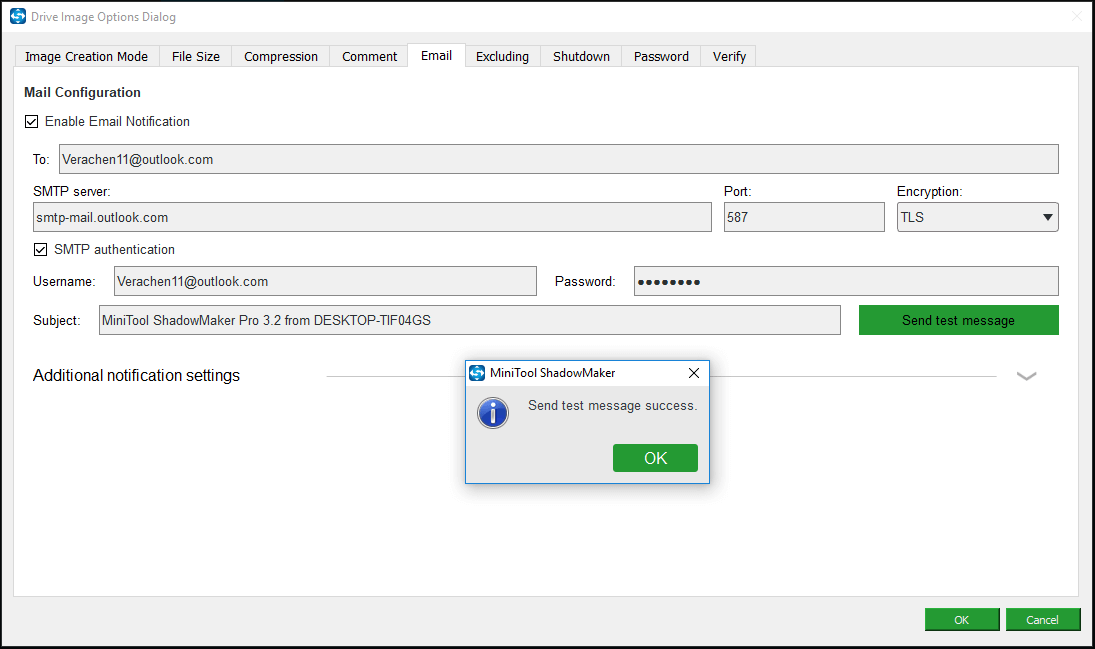
Send test message: Input subject and click this button to verify whether you can receive the email notification successfully.
Send notification when the operation succeeds: When backup operation succeeds, an email notification will be sent.
Send notification when the operation fails: When a backup operation fails, an email notification will be sent.
Here, we will show you the settings for two frequently-used postboxes – Gmail and Outlook:
Gmail:
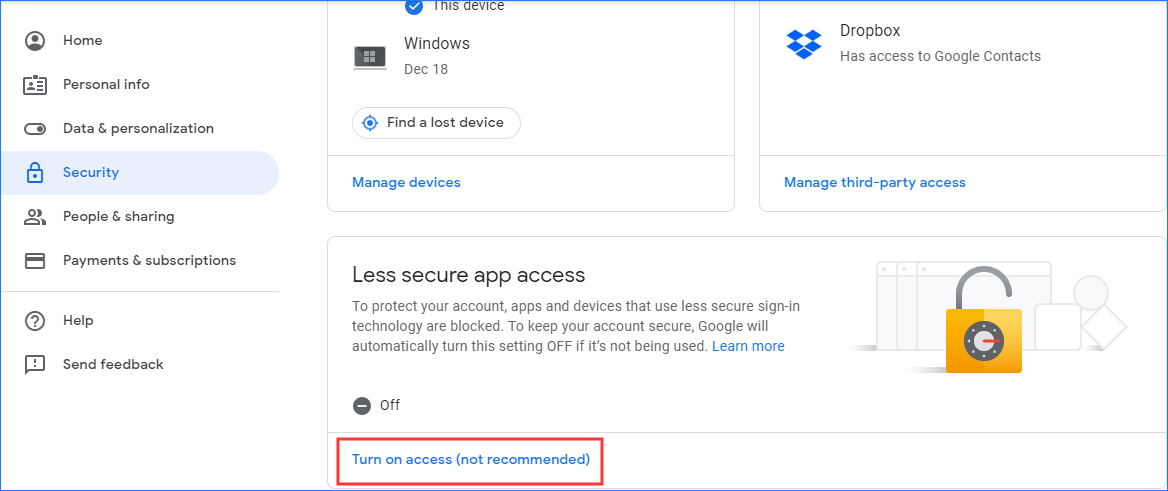
If you want to send notifications to your Google Gmail, you need to open the access permission firstly.
Step 1: Click the head portrait of your account and choose Manage your Google Account.
Step 2: Go to the Security tab, scroll down to find Turn on access (not recommended) and enable it.
Step 3: In the new window, switch the toggle to ON. After that, you will receive an email. Just ignore it.
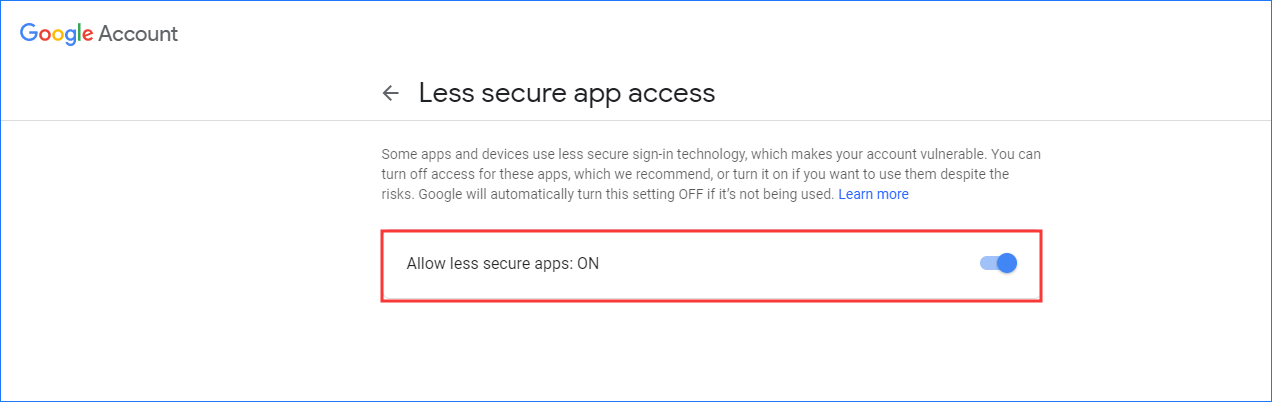
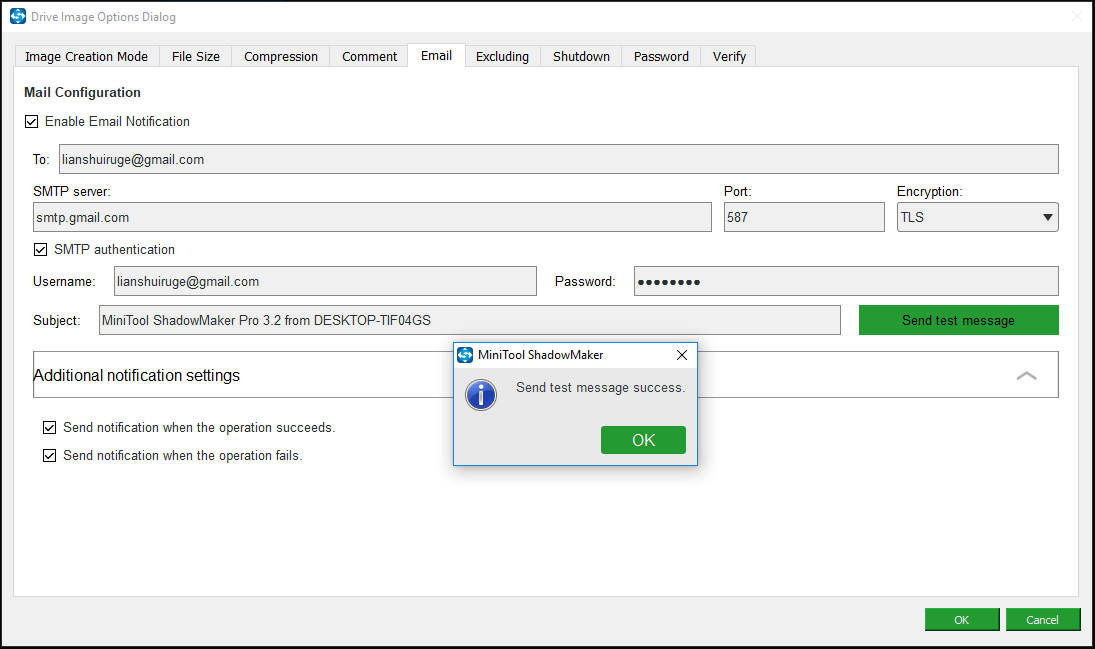
Then, you can configure the email notifications settings.
1. For Gmail, the SMTP server should be smtp.gmail.com.
2. For Encryption, you can choose SSL or TLS. The Port is selected by default after choosing the encryption method.
3. In SMTP authentication, input your Gmail and the password of the account.
Outlook
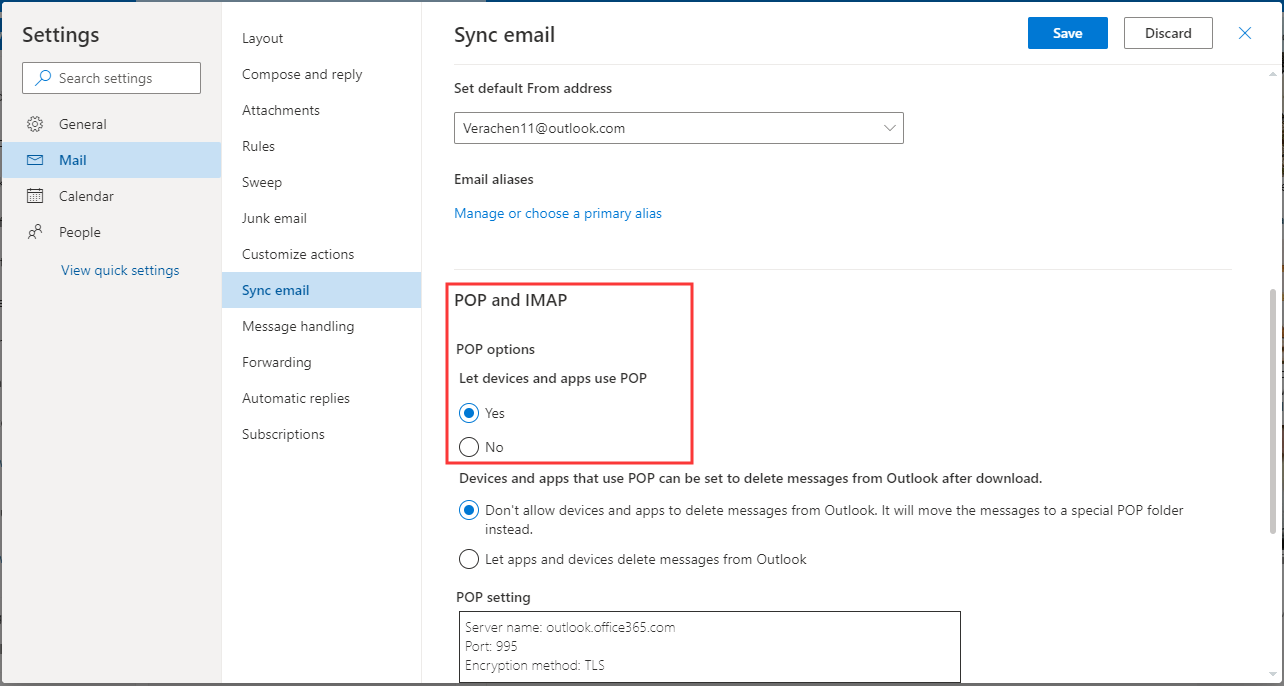
If you are using an Outlook email, you need to do another thing – enable POP access in outlook.com. POP access is disabled by default. To enable POP access, follow the guide:
1. Go to Settings > View all Outlook settings > Mail > Sync email.
2. Under POP and IMAP, select Yes from the Let devices and apps use POP section.
3. Click Save.
Then, make the settings for email notifications:
1. For Outlook, the SMTP server should be smtp-mail.outlook.com.
2. For Encryption, you can only TLS. The Port is selected by default after choosing the encryption method.
3. In SMTP authentication, input your Outlook email and the password of the account.
Excluding
This option allows you to exclude some unnecessary items from a backup. Here is one option for excluding Windows page file and hibernation files, and you can check it according to your needs.

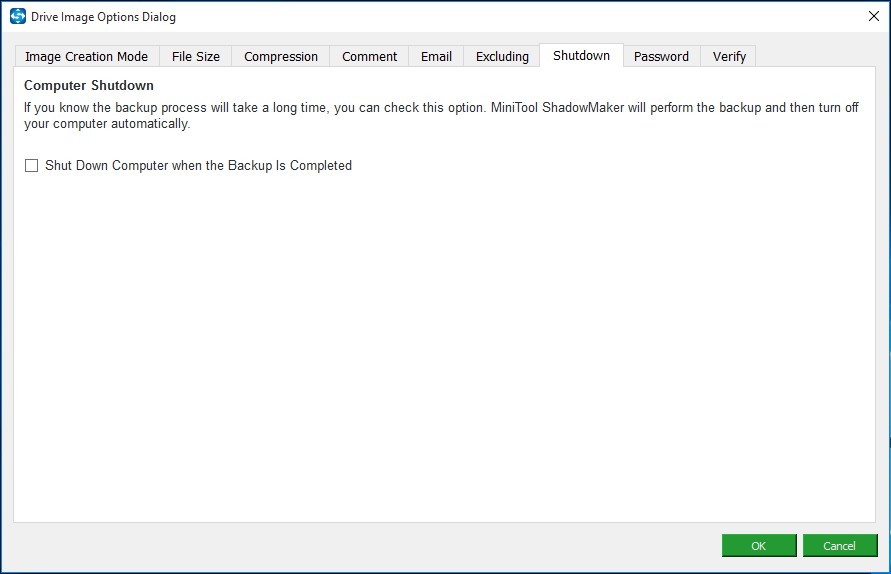
Shutdown
This option enables to shut down the computer when a backup is finished. If you know the backup progress will take a long time, it is recommended to check this option. In this case, you don’t need to wait until the backup operation is completed. And then this program will perform the backup and turn off your computer automatically.
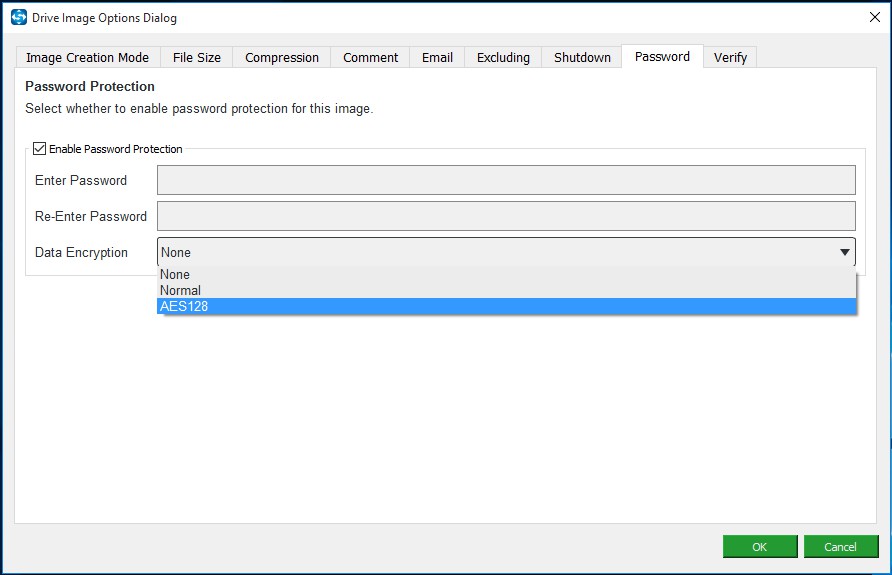
Password
By checking Enable Password Protection, you can add password protection to a specific backup. Three data encryption levels are provided for your choice: None, Normal, AES128.
AES128: The Advanced Encryption Standard refers to a block cipher that uses shared secret encryption based on a symmetric key algorithm, using a key sized at 128 bits.
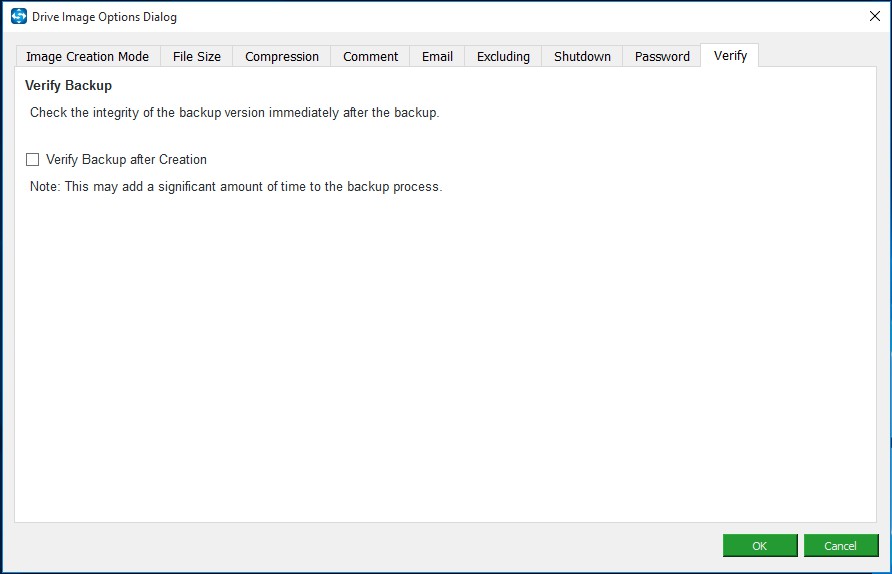
Verify
By checking Verify Backup after Creation option, you can check the integrity of the backup immediately after the backup completes.
Note
This may add a significant amount of time to the backup progress.
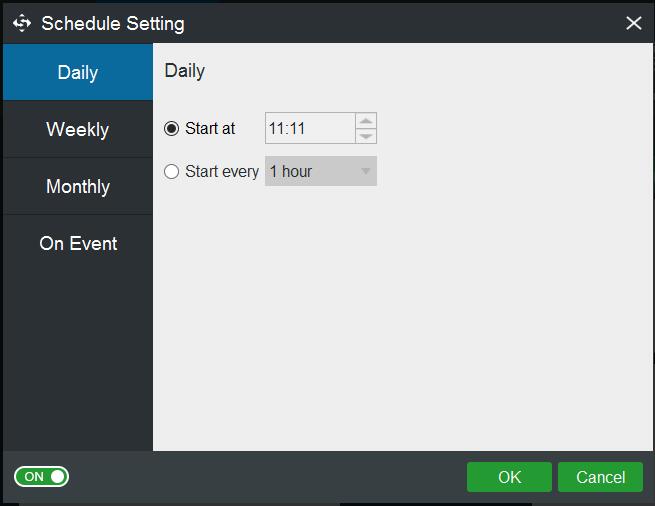
Schedule Setting
Schedule Setting is user-friendly for those who are used to making a backup on a regular basis. When clicking Schedule button, you see this feature is disabled by default.
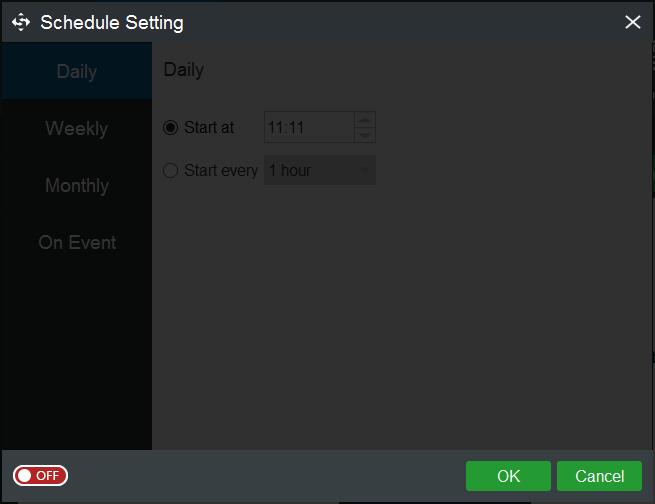
Just switch to
![]() , then you see MiniTool ShadowMaker offers four ways to customize schedule backup, they are:
, then you see MiniTool ShadowMaker offers four ways to customize schedule backup, they are:
Daily- Set some particular time points to execute the scheduled backup task each day.
1. Start backup at a specified time point once a day.
2. Start backup every 1, 2, 3, 4, 6 or 8 hours after clicking Back up Now or Back up Later.
Weekly – Choose a day/days in each week to back up at a specific time.
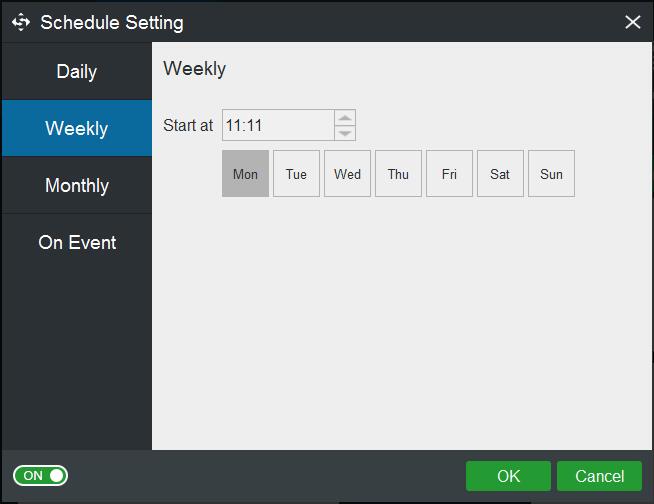
Monthly – Run backup task at the specified time point on the chosen day(s) in a month.
Please note if you choose to back up on 31st every month, then MiniTool ShadowMaker won't start this backup in February, April, June, September, and November. All should be carried out according to the real situation.

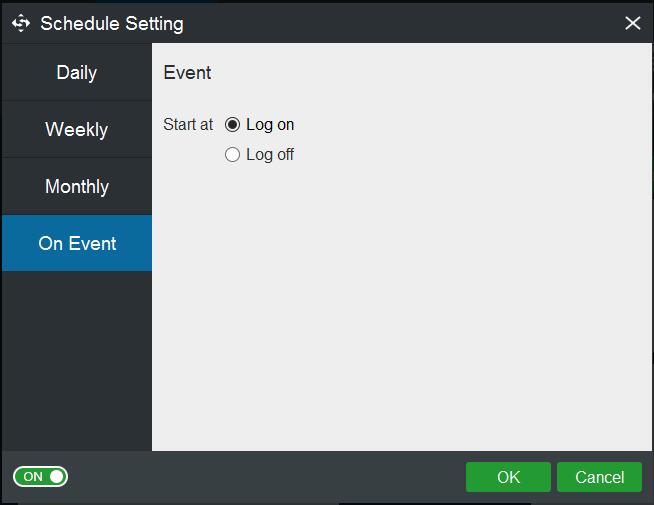
On Event - Run the backup based on specified events.
1. Log on: Set to start backup task automatically when logging on to the operating system.
2. Log off: Perform the backup operation when logging off of the operating system.
Tip
Schedule setting adopts Incremental Backup method by default so as to save storage space to the highest degree.
Backup Scheme
Backup Scheme helps you automatically manage disk space usage by deleting the specified backup image file versions. By default, Backup Scheme is disabled.
Turn to
![]() , then MiniTool ShadowMaker offers three modes, and they are:
, then MiniTool ShadowMaker offers three modes, and they are:
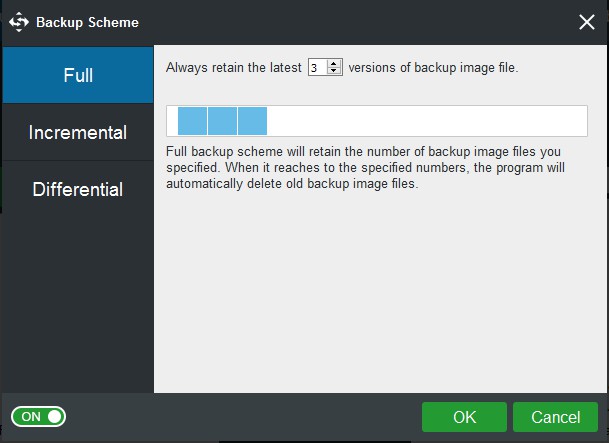
Full Backup Scheme:
1. Always retain the latest xx versions of backup image file.
2. Full backup scheme will retain the number of backup image files you specified. When it reaches to the specified numbers, the program will automatically delete old backup image files.
Example:
Always retain the latest 3 versions of backup image file.
FULL1→FULL2→FULL3→FULL4 (delete FULL1)→FULL5 (delete FULL2)→FULL6 (delete FULL3)→FULL7 (delete FULL4)
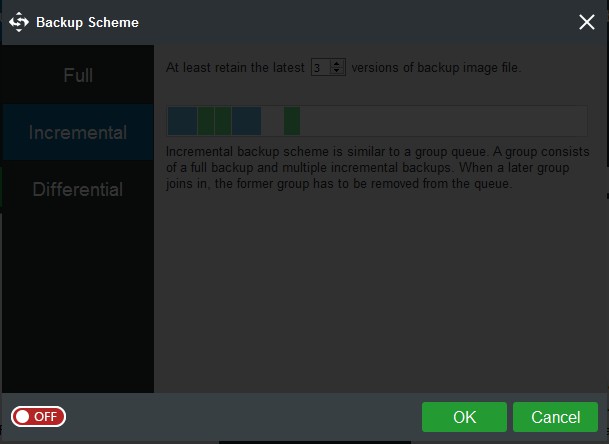
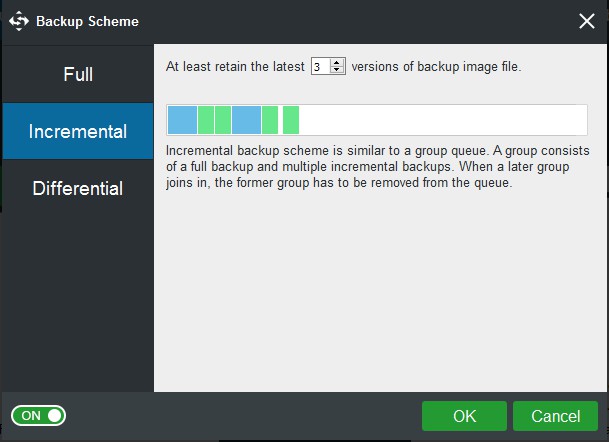
Incremental Backup Scheme:
1. At least retain the latest xx versions of backup image file.
2. Incremental backup scheme is similar to a group queue. A group consists of a full backup and multiple incremental backups. When a later group joins in, the former group has to be removed from the queue.
Example:
At least retain the latest 3 versions of backup image file.
FULL1→INC1→INC2→FULL2→INC3→INC4(delete FULL1, INC1, INC2)→FULL3→INC5→INC6 (delete FULL2, INC3, INC4)
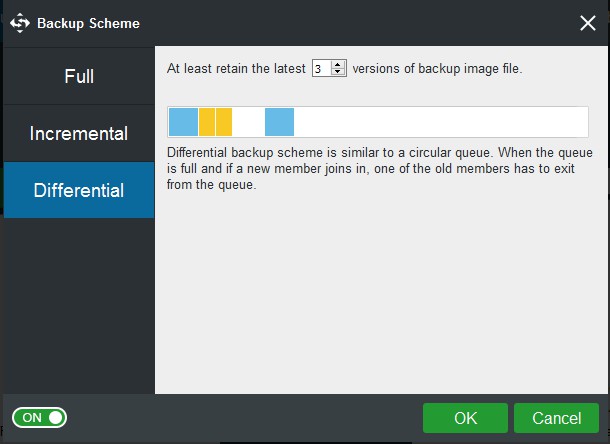
Differential backup scheme:
1. At least retain the latest xx versions of backup image file.
2. Differential backup scheme is similar to a circular queue. When the queue is full and if a new member joins in, one of the old members has to exit from the queue.
Example:
At least retain the latest 3 versions of backup image file.
FULL1→DIFF1→DIFF2→FULL2 (delete DIFF1)→DIFF3 (delete DIFF2)→DIFF4 (delete FULL1)